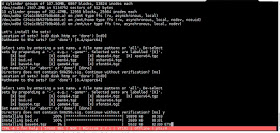
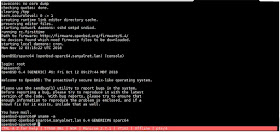
I got a SIMH MicroVAX 3900 instance loaded with the latest 2018 NetBSD/vax 8.0 on a Raspberry Pi 3B+ running Raspbian Stretch Lite 4.14.79-v7+ armv7l GNU/Linux.
The VAX has two Digital RA92 disk drives and two Digital DELQA Q-Bus Ethernet Controller network adapters. My usual practice is to keep DECnet and IP networks separate; the first DELQA talks IP and the 2nd DELQA will perhaps talk DECnet, or at the least LAT, if this NetBSD port of the latd daemon from DECnet-Linux works (I will write about it in a future blog post if it does).
The virtual SIMH network adapters are connected to the Raspberry Pi host using VDE (virtual distributed Ethernet) which is natively supported by SIMH (see SIMH ini file later down).
The following packages were installed in preparation:
# apt-get install libpcap-dev bridge-utils p7zip net-tools screen openvpn wireshark tshark tcpdump iptraf libsdl2-dev wget binutils-doc make autoconf automake1.9 libtool flex bison gdb vde2 libvdeplug2 vde2-cryptcab libvde-dev libvdeplug-dev ipcalc htop iotop stunnel4
SIMH stable 3.9 source code was downloaded and compiled using the following command line which I have described previously in "How to Build Your Own Digital DEC MicroVAX 3900 Running OpenVMS VAX VMS Operating System: SIMH on CentOS 7 Running OpenVMS/VAX 7.3".
# make USE_READER_THREAD=1 USE_TAP_NETWORK=1 USE_INT64=1 vax vax780 pdp11
The Raspbian DHCP service "dhcpcd" was disabled, and a static IP configuration was set in the file /etc/network/interfaces.d/eth0:
root@pi01:~# cat /etc/network/interfaces.d/eth0
auto eth0
iface eth0 inet static
address 192.168.1.10
netmask 255.255.255.0
network 192.168.1.0
broadcast 192.168.1.255
gateway 192.168.1.1
dns-nameservers 208.67.222.222 208.67.220.220
post-up /root/netsetup/bridge-tap-vde-setup.sh > /tmp/bridge-tap-vde-setup.sh.log 2>&1
The "/root/netsetup/bridge-tap-vde-setup.sh" script referenced above is used to set up a VDE switch and plugs for SIMH (as well as an additional tun/tap for future use):
#!/bin/bash
#
# ---
# bridge-tap-vde-setup.sh
# ---
# Bridge, VDE and Tun/Tap Network Device Setup Script to run emulators.
# Tested on Raspberry Pi Raspbian GNU/Linux 9 armv7l / 4.14.79-v7+
#
# Basically does this:
#
# -------
# |Network|
# |Adapter|
# |eth0 |
# -------
# | ------
# ----------|bridge|
# |br-ip |
# ------
# | --------
# |--------|inettap0| <--> For use by TBD emulator
# | --------
# |
# | ----------
# --------|VDE Switch| (Virtual Distributed Ethernet switch)
# ----------
# |
# | -----------
# |-|vde-ip-tap0| <--> Available to more TBD emulators
# | -----------
# |
# | -----------
# |-|vde-ip-tap1| <--> Available to more TBD emulators
# | -----------
#
# More details:
# http://supratim-sanyal.blogspot.com/2018/10/bionic-beaver-on-zarchitecture-my.html
#
# Licensed under "THE BEER-WARE LICENSE" (Revision 42):
# Supratim Sanyal <https://goo.gl/FqzyBW> wrote this file. As long as
# you retain this notice you can do whatever you want with this stuff.
# If we meet some day, and you think this stuff is worth it, you can buy
# me a beer in return.
# ---
# ---
# Raspbian specific; dhcpcd is disabled as it was getting IP addresses for all taps and vdeplugs
# ---
# ----
# The physical interface that has the IP address which will be moved to a bridge and
# TAP and VDE plug interfaces made available from the bridge
# ----
DEVICE="eth0"
# ----
# No more changes should be required from here
# ----
HOSTIPANDMASK=`ip addr show dev $DEVICE | grep inet | head -1 | cut -f 6 -d " "`
HOSTIP=`echo $HOSTIPANDMASK|cut -f 1 -d "/"`
HOSTNETMASK=`echo $HOSTIPANDMASK|cut -f 2 -d "/"`
HOSTBCASTADDR=`ip addr show dev $DEVICE | grep inet | head -1 | cut -f 8 -d " "`
HOSTDEFAULTGATEWAY=`route -n | grep ^0.0.0.0 | gawk -- '{ print $2 }'`
NETWORK=`ipcalc $HOSTIP/$HOSTNETMASK | grep Network | cut -f 2 -d ":" | cut -f 1 -d "/" | tr -d '[:space:]'`
echo `date` ---- GATHERED INFORMATION -----
echo `date` HOSTIP=$HOSTIP HOSTNETMASK=$HOSTNETMASK NETWORK=$NETWORK HOSTBCASTADDR=$HOSTBCASTADDR HOSTDEFAULTGATEWAY=$HOSTDEFAULTGATEWAY
echo `date` -------------------------------
# ---
# Create a TAP network interface for emulators
# ---
ip tuntap add inettap0 mode tap user johnsmith
# ---
# Also create a VDE switch with TAP plugs for use by simuators
# ---
#
vde_switch -t vde-ip-tap0 -s /tmp/vde-ip.ctl -m 666 --mgmt /tmp/vde-ip.mgmt --mgmtmode 666 --daemon # spare plug
vde_plug2tap -s /tmp/vde-ip.ctl -m 666 -d vde-ip-tap1 # spare plug
#vde_plug2tap -s /tmp/vde-ip.ctl -m 666 -d vde-ip-tap2 # spare plug
#vde_plug2tap -s /tmp/vde-ip.ctl -m 666 -d vde-ip-tap3 # spare plug
# Create a Bridge
ip link add name br-ip type bridge
brctl stp br-ip on
# Bridge the NIC $DEVICE, the TAP device and VDE Switch TAP0 plug
ip link set $DEVICE master br-ip
ip link set inettap0 master br-ip
ip link set vde-ip-tap0 master br-ip
# Remove default route and move the IP address from $DEVICE to the bridge
ip route delete default via $HOSTDEFAULTGATEWAY dev $DEVICE
ip addr flush dev $DEVICE
ip addr add $HOSTIPANDMASK broadcast $HOSTBCASTADDR dev br-ip
# Bring everything back up
ip link set dev br-ip up
ip link set dev inettap0 up
ip link set vde-ip-tap0 up
ip link set vde-ip-tap1 up
#ip link set vde-ip-tap2 up
#ip link set vde-ip-tap3 up
# Reset the default route via the bridge interface which now has the IP
ip route add default via $HOSTDEFAULTGATEWAY dev br-ip
#echo `date` ---- NETWORK RECONFIGURED, WAITING TO SETTLE DOWN ----
#sleep 30
echo `date` ---- RELOADING UFW ----
ufw reload
sync
echo `date` ---- AFTER BRIDGE AND TAP ----
ip addr
echo `date` --- ROUTE ---
#ip route show
route -n
echo `date` --- BRIDGE ---
brctl show
#echo `date` --- IPTABLES ---
#iptables -L
echo `date` --- UFW ---
ufw status verbose
#echo `date` --- PING TEST ---
#ping -c 5 google.com
echo `date` -------------------------------
# --
# We can now attach simulators
# --
The above network setup script produces a network like so:
$ ip addr
1: lo: <LOOPBACK,PROMISC,UP,LOWER_UP> mtu 65536 qdisc noqueue state UNKNOWN group default qlen 1000
link/loopback 00:00:00:00:00:00 brd 00:00:00:00:00:00
inet 127.0.0.1/8 scope host lo
valid_lft forever preferred_lft forever
2: eth0: <BROADCAST,MULTICAST,PROMISC,UP,LOWER_UP> mtu 1500 qdisc pfifo_fast master br-ip state UP group default qlen 1000
link/ether b8:27:eb:48:39:a9 brd ff:ff:ff:ff:ff:ff
3: wlan0: <BROADCAST,MULTICAST,PROMISC> mtu 1500 qdisc noop state DOWN group default qlen 1000
link/ether b8:27:eb:1d:6c:fc brd ff:ff:ff:ff:ff:ff
4: inettap0: <NO-CARRIER,BROADCAST,MULTICAST,PROMISC,UP> mtu 1500 qdisc pfifo_fast master br-ip state DOWN group default qlen 1000
link/ether b2:e3:6b:52:47:c4 brd ff:ff:ff:ff:ff:ff
5: vde-ip-tap0: <BROADCAST,MULTICAST,PROMISC,UP,LOWER_UP> mtu 1500 qdisc pfifo_fast master br-ip state UNKNOWN group default qlen 1000
link/ether be:cd:00:ed:5c:5a brd ff:ff:ff:ff:ff:ff
6: vde-ip-tap1: <BROADCAST,MULTICAST,PROMISC,UP,LOWER_UP> mtu 1500 qdisc pfifo_fast state UNKNOWN group default qlen 1000
link/ether c6:94:81:f1:ec:5a brd ff:ff:ff:ff:ff:ff
7: br-ip: <BROADCAST,MULTICAST,PROMISC,UP,LOWER_UP> mtu 1500 qdisc noqueue state UP group default qlen 1000
link/ether b2:e3:6b:52:47:c4 brd ff:ff:ff:ff:ff:ff
inet 192.168.1.10/24 brd 192.168.1.255 scope global br-ip
valid_lft forever preferred_lft forever
A SIMH ini file was created for the MicroVAX 3900 to install and run NetBSD:
; -------------------------------------------------
; SIMH MicroVAX 3900 "NETBSD" (x.xxx) Configuration
; SANYALnet Labs
; supratim@riseup.net
; http://supratim-sanyal.blogspot.com/
; -------------------------------------------------
; Load CPU microcode
load -r ../data/ka655x.bin
;
; Attach non-volatile RAM to a file
attach nvr ../data/nvram.bin
;
; The original MicroVAX 3900 had a max of 64MB memory
set cpu 64m
set cpu idle=netbsd
;
; Define disk drive types. RA92 is largest-supported VAX drive.
set rq0 ra92
set rq1 ra92
;
; Attach defined drives to local files
attach rq0 ../data/netbsd-vax-d0.dsk
attach rq1 ../data/netbsd-vax-d1.dsk
;
; Attach the CD-ROM to its file (read-only)
set rq2 cdrom
attach -r rq2 ../data/NetBSD-8.0-vax.iso
;
; Disable unused devices. It's also possible to disable individual devices,
; using a construction like "set rq2 disable" if desired.
;
set rq3 disable
set rl disable
set ts disable
;
; Attach network adapters
set xq enabled
set xq type=DELQA
set xq mac=aa-00-00-ed-5c-a5
attach xq vde:/tmp/vde-ip.ctl
set xqb enabled
set xqb type=DELQA
set xqb mac=AA-00-04-00-8E-07
attach xqb vde:/tmp/vde-ip.ctl
;
; ********************************************
; ********************************************
; Uncomment the line below to enable auto-boot
; ********************************************
; ********************************************
;---dep bdr 0
;
; Choose one of the following lines. SET CPU CONHALT returns control to the
; VAX console monitor on a halt event (where behavior will be further
; determined by whether auto-boot is set (see "dep bdr" above).
; SET CPU SIMHALT will cause the simulator to get control instead.
;set cpu conhalt
set cpu simhalt
;
echo
echo
echo ___________________________________
;
; Now start the emulator
boot cpu
;
; Exit the simulator
exit
Finally, the MicroVAX 3900 was booted up from CD-ROM ("boot dua2" in SIMH) and NetBSD/VAX installation started.
The actual NetBSD/vax 8.0 installation process on the DEC MicroVAX 3900 was well designed, user-friendly sensible with no surprises, though it takes a bit of time for the full installation (hours!). The installation screens are documented extensively at NetBSD Example Installation.
It was fun to finally boot into a classic Microvax 3900 running a modern and current NetBSD for VAX operating system. Here is a little video of the experience.


