I have reached the end of the internet and found the ultimate defragmenter for NTFS file systems on Windows.
Well - sort of. I still use platter drives while I still watch SSD with keen interest, I do not have full faith on SSD drives yet. In the last couple of months, I have seen SSD drives swapped out for good old high-speed platter disk drives (specifically, the fabulous
15K / 15000 RPM 6 GBPS Hard Drives) since the SSDs wouldn't last for more than a couple of weeks on systems needing humongous numbers of read-write cycles. However, for the general user, I do think SSD has come along and we are at a stage where their "
functional life outlasts their useful life".
One of the joys of MS-DOS and Windows computer hard disk drives has always been to run defragment tools and watch the little boxes line up, imagining super-fast DISK I/O as soon as the hours-long processes complete. All of us have spent significant portions of our lives defragmenting hard disks -
Norton Utilities Speed Disk, PC Tools, the defragmenters included with DOS and Windows from Microsoft, the continuing search for the best ... we have fond memories.
I believe that search has ended now, a quarter century from running a defragmenter the first time.
Curiously, it is not yet another defragmentation tool by itself; it just provides a nice GUI to run two Microsoft tools back to back - the venerable
Windows Sysinternals Contig that used to be my #1 defragmenter, followed by the ubiquitous
defragmenter included with Windows. The tool actually does not claim to be a defragmentation utility by itself. The name "Power Defragmenter GUI" is very clear in conveying this is a GUI front-end to powerful underlying tools.
I have tested it on two Windows XP Pro systems called
WEXPEE and
WXPEE2 that speak DECnet and are part of the global
HECnet hobbyist DECnet network.
As a preparatory step, I highly recommend cleaning out junk from your disk drive before defragmenting it. Useless accumulated files on your drive should be removed and will also make for quicker defragmentation. I use three tools to clean junk from my drives:
- The Windows "Disk Cleanup" tool (part of Windows)
- System Ninja
- CCleaner
To install Power Defragmenter GUI,
 |
| Power Defragmenter GUI - .exe Executable |
- Download Power Defragmenter GUI
- The download is a zip file called Power-Defragmenter.zip that contains just one executable PowerDefragmenter.exe; extract the zip file into a new dedicated folder containing the executable PowerDefragmenter.exe. For example, extract the zip file into the folder c:\temp\power-defrag\ so that you extract the 481 KB executable into c:\temp\power-defrag\PowerDefragmenter.exe.
 |
| Microsoft Sysinternals Contig - exe Executable |
- Download Widnows Sysinternals Contig
- Again, the Contig download is a zip file called Contig.zip that contains 32 and 64-bit versions of contig.exe and a EULA. The 32-bit contig.exe executable is just 248 KB! Extract contig.zip into another new dedicated folder. For example, extract Contig.zip into c:\temp\contig\
 |
| Copy files in Contig folder to Power Defragmenter GUI folder |
- Now copy over the Contig files from the directory you unzipped Contig into to the directory you unzipped Power Defragmenter GUI into. In the examples above, this means copy the files from c:\temp\contig\ to c:\temp\power-defrag\.
 |
| Run PowerDefragmenter.exe |
That is it as far installation of Power Defragmenter GUI is concerned. You can now launch PowerDefragmenter.exe by double-clicking it from the folder you extracted Power Defragmenter GUI into that now also has the Contig.exe executable.
Power Defragmenter GUI will start up showing a progress-bar indicating it is launching Power Defragmenter GUI installer and then present the main screen. I guess the "installer" notice is shown because Power Defragmenter declares itself as an installer to grab administrative rights; it does not really "install" anything and runs totally from the folder.
 |
| Power Defragmenter GUI initial screen |
If you see carefully, you will notice the little note at the bottom above the buttons saying that Power Defragmenter GUI has located the version of Contig.Exe you copied over to it's folder.
Clicking "Next" will bring you to the following screen:
 |
| Power Defragmenter GUI - Defragmentation Options |
I always choose the last option, "TriplePass(TM) Disk Defragmentation" to defragment the heck out of my drives. This is also where the true power of the tool comes through. So, go ahead, choose "TriplePass(TM) Disk Defragmentation" and click Next.
 |
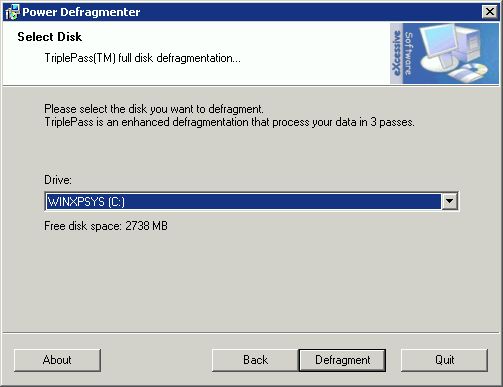
| Power Defragmenter GUI: Choose Drive to Defragment |
Choose the drive to defragment (the system drive should already be selected; you can use the drop-down list to defragment other drives if you have them) and click on Defragment to start the defragmentation process.
Power Defragmenter GUI will first launch Contig for deep-defragmentation of files. Contig may present a EULA to accepts the first time it is launched, simply accept the EULA once and your computer remembers it. You can use Ctrl-S and Ctrl-Q to pause and resule the fast-scrolling output if you want to look at what is going on.
 |
| Power Defragmenter GUI invokes Windows Sysinternals Contig for three passes |
Update: In prior versions, Power Defragmenter GUI then invoked the Windows Defragmenter tool included with Windows to wrap of the ferocious attack on file system fragmentation. This no longer seems to be the case, apparently from the time Power Defragmenter GUI was updated to support Windows Vista and later. Here is a screenshot from the older versions showing Power Defragmenter GUI invoking Windows Defragmenter in command mode; once again, this will probably not happen any more.
 |
| Power Defragmenter GUI invokes Windows Defragment Tool |
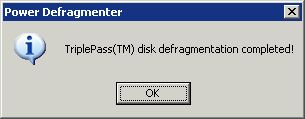
You will be informed when Power Defragmenter GUI is done:
 |
| Power Defragmenter GUI - TriplePass(TM) completed |


