Search

Sunday, September 29, 2019

Virtualization on FreeBSD Host and Oracle VirtualBox Guests with VDE Networking

Supratim Sanyal's Blog: Oracle VirtualBox Guest Networking using VDE / VDE2 (Virtual Distributed Ethernet)


I described the basic setup for VirtualBox virtualization on FreeBSD 12-RELEASE as a host in an earlier post. Here are some notes on setting up VDE (Virtual Distributed Ethernet) guest networking with Oracle VirtualBox hypervisor version 5.2.32 running on FreeBSD 12.0-RELEASE-p10.

vde2 User-mode virtual ethernet infrastructure was installed from FreeBSD binary package repository using "sudo pkg install vde2". Keep in mind vde2 should be installed, not the "vde" package which is also available.

VirtualBox was built from the FreeBSD ports sources using "cd /usr/ports/emulators/virtualbox-ose/ && make install clean" with VDE networking option selected from the configuration screens produced by the build script.

The following setup script vde-switch.sh is invoked at boot time from /etc/rc.local to set the VDE switch and tap interfaces up:


It is to be noted that on FreeBSD, rc.local should source /etc/rc.conf first, i.e. the following should appear first before invoking other startup scripts:
. /etc/rc.conf

Once the VDE switch is created, the Oracle VirtualBox virtual machines are configured to use the VDE switch. This is accomplished by a series of "vboxmanage modifyvm" commands, as in the example below which configured my IBM OS/2 Warp 4.5 for eBusiness virtual machine:

$ vboxmanage modifyvm OS2-Warp-4.5-Server --nic1 generic
$ vboxmanage modifyvm OS2-Warp-4.5-Server --nicgenericdrv1 VDE
$ vboxmanage modifyvm OS2-Warp-4.5-Server --nicproperty1 network=/tmp/vde-ip.ctl

To identify the VDE switch to be used for virtual machine networking, the "network=" specification in the last command above uses the same socket specified in the "-s" switch when setting up the VDE switch at boot time.

After configuring the VirtualBox virtual appliance for VDE using the commands, the VirtualBox GUI settings show the networking configuration as the screenshot at the top of this post.

It may be possible to use the GUI and choose the VDE switch-related parameters graphically, but I have not tried that personally.

VDE networking for VirtualBox appliances works flawlessly once configured. I have multiple Virtualization hosts and connect all the VirtualBox virtual machines across all of them to one logical Ethernet switch using VDE's Ethernet-over-SSL tunneling capability. A typical command line to set up a Ethernet-over-SSL tunnel to another VM host looks like:

/usr/local/bin/dpipe /usr/local/bin/vde_plug /tmp/vde-ip.ctl = ssh vde0@$REMOTE vde_plug /tmp/vde-ip.ctl

For the above to work, obviously password-less SSH login to the "vde0" account on the remote host specified by the REMOTE environment variable had to be set up.

I also usually enable VDE switch's fstp (Fast Spanning Tree Protocol) on all of my VDE switches in the hope of avoiding Ethernet packet flooding-related Network issues. It appears once in a while the VDE port that is the end-point of the SSL tunnel to the remote VDE switch is designated "root" sporadically, potentially impacting connectivity to other VDE switches. When this happens, I manually change the SSL tunnel source port to and edge port using the "fstp/setedge" command from unixterm (the control program for VDE switch). Here is a typical example of such a session, where port 3 had transitioned to a "root" port which I force back to edge port:

$ unixterm /tmp/vde-ip.mgmt 
VDE switch V.2.3.2
(C) Virtual Square Team (coord. R. Davoli) 2005,2006,2007 - GPLv2

vde$ port/allprint
0000 DATA END WITH '.'
Port 0001 untagged_vlan=0000 ACTIVE - Unnamed Allocatable
 Current User: NONE Access Control: (User: NONE - Group: NONE)
  -- endpoint ID 0007 module tuntap      : tap0
Port 0002 untagged_vlan=0000 ACTIVE - Unnamed Allocatable
 Current User: root Access Control: (User: NONE - Group: NONE)
  -- endpoint ID 0003 module unix prog   : vde_plug: user=root PID=1043
Port 0003 untagged_vlan=0000 ACTIVE - Unnamed Allocatable
 Current User: localuser Access Control: (User: NONE - Group: NONE)
  -- endpoint ID 0009 module unix prog   : vde_plug: user=localuser PID=1120
Port 0004 untagged_vlan=0000 ACTIVE - Unnamed Allocatable
 Current User: localuser Access Control: (User: NONE - Group: NONE)
  -- endpoint ID 0011 module unix prog   : VirtualBOX user=localuser PID=1747 SSH=10.100.0.123
Port 0005 untagged_vlan=0000 ACTIVE - Unnamed Allocatable
 Current User: localuser Access Control: (User: NONE - Group: NONE)
  -- endpoint ID 0013 module unix prog   : VirtualBOX user=localuser PID=1748 SSH=10.100.0.123
Port 0006 untagged_vlan=0000 ACTIVE - Unnamed Allocatable
 Current User: localuser Access Control: (User: NONE - Group: NONE)
  -- endpoint ID 0015 module unix prog   : VirtualBOX user=localuser PID=3725 SSH=10.100.0.123
Port 0007 untagged_vlan=0000 ACTIVE - Unnamed Allocatable
 Current User: localuser Access Control: (User: NONE - Group: NONE)
  -- endpoint ID 0017 module unix prog   : VirtualBOX user=localuser PID=1750 SSH=10.100.0.123
.
1000 Success

vde$ fstp/print
0000 DATA END WITH '.'
FST DATA VLAN 0000  
 ++ root 80:00:00:ff:4d:44:85:2d
 ++ designated 80:00:00:ff:4d:44:85:2d
 ++ rootport 0003 cost 20000000 age 1 bonusport 0000 bonuscost 0
 -- Port 0001 tagged=0 portcost=20000000 role=Designated
 -- Port 0002 tagged=0 portcost=20000000 role=Designated
 -- Port 0003 tagged=0 portcost=20000000 role=Root
 -- Port 0004 tagged=0 portcost=20000000 role=Designated
 -- Port 0005 tagged=0 portcost=20000000 role=Designated
 -- Port 0006 tagged=0 portcost=20000000 role=Designated
 -- Port 0007 tagged=0 portcost=20000000 role=Designated
.
1000 Success

vde$ fstp/setedge 0 3 1
1000 Success

vde$ fstp/print
0000 DATA END WITH '.'
FST DATA VLAN 0000  
 ++ root 80:00:00:ff:4d:44:85:2d
 ++ designated 80:00:00:ff:4d:44:85:2d
 ++ rootport 0003 cost 20000000 age 6 bonusport 0000 bonuscost 0
 -- Port 0001 tagged=0 portcost=20000000 role=Designated
 -- Port 0002 tagged=0 portcost=20000000 role=Designated
 -- Port 0003 tagged=0 portcost=20000000 role=Edge
 -- Port 0004 tagged=0 portcost=20000000 role=Designated
 -- Port 0005 tagged=0 portcost=20000000 role=Designated
 -- Port 0006 tagged=0 portcost=20000000 role=Designated
 -- Port 0007 tagged=0 portcost=20000000 role=Designated
.
1000 Success

vde$ logout


In the above example case, after setting the edge port, the remote VDE switch (the other end of the Ethernet-over-SSL tunnel) correctly show it's own Port 2 connected to Port 3 over SSH:

$ unixterm /tmp/vde-ip.mgmt 
VDE switch V.2.3.2
(C) Virtual Square Team (coord. R. Davoli) 2005,2006,2007 - GPLv2

vde$ port/allprint
0000 DATA END WITH '.'
Port 0001 untagged_vlan=0000 ACTIVE - Unnamed Allocatable
 Current User: NONE Access Control: (User: NONE - Group: NONE)
  -- endpoint ID 0007 module tuntap      : vde-ip-tap0
Port 0002 untagged_vlan=0000 ACTIVE - Unnamed Allocatable
 Current User: vde0 Access Control: (User: NONE - Group: NONE)
  -- endpoint ID 0003 module unix prog   : vde_plug: user=vde0 PID=6352 SSH=10.100.0.13
.
1000 Success

vde$ fstp/print
0000 DATA END WITH '.'
FST DATA VLAN 0000 ROOTSWITCH 
 ++ root 80:00:00:ff:4d:44:85:2d
 ++ designated ff:ff:ff:ff:ff:ff:ff:ff
 ++ rootport 0000 cost 0 age 1287834 bonusport 0000 bonuscost 0
 -- Port 0001 tagged=0 portcost=20000000 role=Designated
 -- Port 0002 tagged=0 portcost=20000000 role=Designated
.
1000 Success

vde$ logout


Thursday, September 26, 2019

FreeBSD QEMU Host with SliTaz Linux Guest


I got the awesome SliTaz Linux running as a QEMU guest on FreeBSD 12.0-RELEASE. The following references were great:

I did not build QEMU from source for this experiment, but just grabbed the pre-built package, along with the "screen" tool that allows running QEMU inside a detached virtual terminal and a vnc viewer to access the graphical screen of the QEMU-emulated machine:


# pkg install screen
# pkg install qemu
# pkg install tigervnc-viewer

The following was added to the file /boot/loader.conf:

if_bridge_load="YES"
if_tap_load="YES"
kqemu_load="YES"

and this was added to /etc/sysctl.conf and FreeBSD rebooted:

net.link.tap.user_open=1

Logging in with a non-privileged user account, the Slitaz Linux distribution was then downloaded and the QEMU virtual machine hard disk set up:

$ mkdir slitaz-linux
$ cd slitaz-linux
$ fetch http://mirror.slitaz.org/iso/3.0/flavors/slitaz-3.0-xvesa.iso
$ qemu-img create -f qcow2 slitaz.qcow2.4GB.disk 4G

QEMU was then launched in a "screen" virtual terminal session (to detach from the "screen" session leaving it running, press Ctrl-a and then d). Here's my shell script that does it.


#!/bin/sh

# Careful of MAC address conflicts in network! Last HEX pair of MAC = last byte of guest IP.
# Also, VNC screen, if any, on dispaly number = last byte of guest IP
# And Console TELNET port = 20800 + last byte of guest IP
# 10.42.2.51      slitaz.sanyalnet.lan slitaz
TELNET_CONSOLE_PORT=20851
VNC_PORT=51

screen -d -m -S slitaz \
./qemu-system-x86_64 \
-m 512 \
-hda slitaz.qcow2.4GB.disk \
-boot c \
-net nic,macaddr="58:9C:FC:52:54:33" \
-net tap,ifname=tap2,script=no \
-nographic \
-vnc :${VNC_PORT} \
####-serial telnet::${TELNET_CONSOLE_PORT},server

sync;sync;sync
##sleep 2
##vncviewer :${VNC_PORT} &

clear
echo "-----"
echo Now you can attach/reattach to Graphical Desktop using \"vncviewer :${VNC_PORT} \&\".
echo QEMU should be running in screen slitaz.
echo "-----"
exit 0


Finally, to access the display of the virtual machine:

$ vncviewer localhost:20851


A note about installing SliTaz on hard-disk:

From an xterm, partition the hard disk /dev/hda manually first for a large linux and small swap partition using fdisk. Then, launch the installer from start -> system tools -> SliTaz Installer. When prompted for the partition to install to, enter /dev/hda1.

You can download this entire Slitaz Linux QEMU prebuilt virtual machine appliance from my google drive. The "root" password is "root", and the "user" password is "password".

Wednesday, September 18, 2019

A Tryst with FreeBSD as VirtualBox Host

Supratim Sanyal's Blog: Oracle VirtualBox OSE on FreeBSD
Oracle VirtualBox OSE on FreeBSD

I have been playing on and off with FreeBSD forever, but had never used it seriously as a primary hypervisor platform. Most of my time with FreeBSD has been with the derived TrueOS distribution (which has recently refocused to become a server operating system, handing off Desktop usage to Project Trident) as a deskstop operating system.

Curious to see how good FreeBSD is as a virtualization host, I wiped my Dell PowerEdge 2950 clean and installed FreeBSD 12 with Lumina desktop environment, and subsequently built and installed VirtualBox OSE, overcoming a couple of minor gotchas due to my unfamiliarity with FreeBSD:

  • The FreeBSD source code is needed to build the kernel driver for VirtualBox. Since I had skipped the source code checkbox in the installer options during installing FreeBSD, this is what I did later based on recommendations of the thriving online FreeBSD community:

# fetch ftp://ftp.freebsd.org/pub/`uname -s`/releases/`uname -m`/`uname -r | cut -d'-' -f1,2`/src.txz
# tar -C / -xvzf src.txz


  • Grabbed the latest FreeBSD operating system updates:
# freebsd-update fetch
# freebsd-update install
... reboot ...
# freebsd-update install

  • Grabbed the latest updates / patches to the FreeBSD ports.
# portsnap fetch update

Then, building VirtualBox for FreeBSD was just a matter of following instructions in the fabulous FreeBSD Handbook. It is important to mention here that as a prolific user of VDE (Virtual Distributed Ethernet) for connecting different hypervisors via ethernet over internet, I made sure the VDE option in the VirtualBox build configuration menu was checked.

I proceeded to test out three of my VirtualBox virtual machine guests on the FreeBSD host:
  • TrueOS (also a FreeBSD-based desktop distribution)
  • OS/2 Warp 4.5 for e-Business
  • Solaris 11.4
Virtual networking for these appliances was achieved through VDE support built into VirtualBox. I describe the VDE2-based networking environment separately in this  post.

All of them came up fine, but with a prominent difference with VirtualBox on Linux: there is no VirtualBox Extensions port to FreeBSD! As a result, a lot of the seamless screen resolution and virtual display adapter integration and flexibility is not possible with VirtualBox on FreeBSD as host. Installing the special VirtualBox guest operating-system drivers from the Guest Additions CD into the guests has no effect in terms of USB 2.0 or later, keyboard, mouse or display improvements.

The VirtualBox Extensions are a proprietary binary distribution from Oracle and unless Oracle decide to port them, there really is no way to use them on FreeBSD. Many a topic in the FreeBSD online communities lament the lack of it.

Given rock solid security and performance of FreeBSD, a VirtualBox hosting environment on FreeBSD is therefore an excellent choice for server-class operating system guests that do not rely on snazzy graphical interfaces.


TrueOS Guest on FreeBSD VirtualBox Host


SANYALnet Labs | TrueOS Guest on FreeBSD VirtualBox Host

TrueOS installs and runs just fine as a VirtualBox guest on a FreeBSD host. Unfortunately, given the lack of the Extension Pack for FreeBSD, I could not find a way to use a higher display resolution. The VirtualBox .vbox XML configuration file specifies "<Display VRAMSize="16"/>".


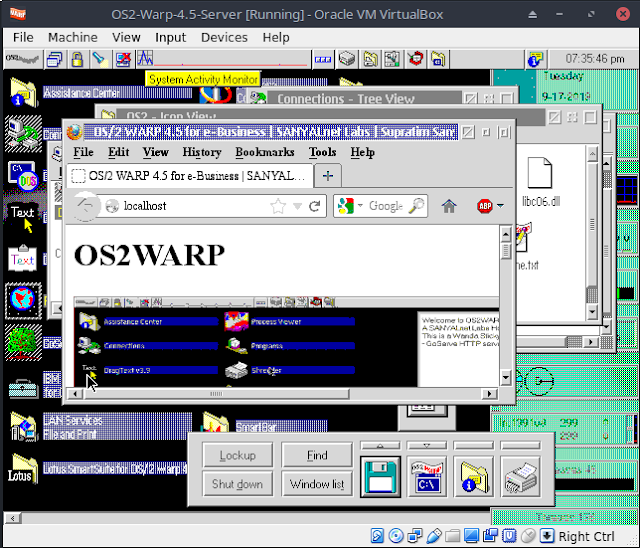
OS/2 Warp 4.5 for e-Business Guest on VirtualBox FreeBSD Host

SANYALnet Labs | OS/2 Warp 4.5 Guest on VirtualBox on FreeBSD Host

The OS/2 Warp VirtualBox appliance was the most troublesome to bring up on the FreeBSD host. The appliance was originally running on a Linux host, with the OS/2 VirtualBox Guest Additions installed inside it. This prevented the appliance from continuing to boot after the splash screen on FreeBSD host. I had to get into the startup menu (Press Alt-F1 when the top-left of the screen shows "OS/2") and reset to the default display driver to get it to work. Unfortunately, this means the OS/2 Warp 4.5 for e-Business desktop is limited to very few colors in a rather low-resolution display.


The .vbox configuration file for the OS/2 Warp 4.5 VirtualBox guest contains "<Display VRAMSize="32"/>". The original configuration file for the OS/2 Warp guest on Linux host contained "<Display controller="VBoxSVGA" VRAMSize="32"/>". Sadly, the VirtualBox VBoxSVGA display driver seems to require the Extension Pack, which does not exist for FreeBSD.

UPDATE

Later on, going into OS/2 Warp's Screen configuration tool (OS/2 Warp -> OS/2 System -> System Setup -> System -> "Screen" tab) to set the resolution to 1024 x 768 x 16777216 and reboot did bring up a higher-resolution 1024x768 desktop with 24-bit color depth (SVGA True Color).

SANYALnet Labs: OS/2 Warp 4.5 SVGA True Color display 1024 x 768 24 bit colors VirtualBox on FreeBSD Host


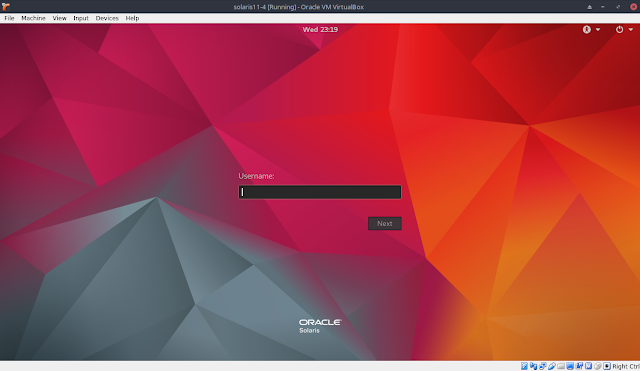
Oracle Solaris 11.4 on FreeBSD VirtualBox Host

SANYALnet Labs | Oracle Solaris 11.4 running on VirtualBox on FreeBSD 12 Host


Surprisingly, the Solaris 11.4 guest runs in a high-resolution high-color display, although the VirtualBox .vbox configuration file has a simple "<Display VRAMSize="12"/>". The default VBoxVGA graphics controller used for Windows versions before Windows 7 and for Oracle Solaris turns out to work great on FreeBSD hosted VirtualBox Solaris 11.4 guest.


Recommended Products from Amazon