Search

Saturday, December 16, 2017

Easy Bitcoin Mining on CentOS 7 and Ubuntu 17 for the curious | cpuminer-multi and slushpool

Supratim Sanyal's Blog: Bitcoin Mining Howto - Slushpool Screenshot


Be informed

Mining cryptocurrency bitcoins: for me, an exercise in satisfying curiosity. You cannot make any real bitcoin money any more using spare CPU cycles on your home computers manipulating blockchains.

If you are serious about mining bitcoins, invest in a modern ASIC based miner.

Otherwise, if you are like me, play around a bit with bitcoin mining and then go back to your boinc daemons for SETI@HOME and LHC@HOME and contribute your CPU cycles to where it matters more for advancing the human species.

Installing cpuminer-multi (Linux - CentOS and Ubuntu)

cpuminer-multi should be run from a user account (never as root).

Install the necessary packages

CentOS 7

$ sudo bash
# yum groupinstall "Development Tools"
# yum install curl-devel openssl-devel git screen
# exit
$ cd


Ubuntu 17

$ sudo apt-get install build-essential autotools-dev autoconf libcurl3 libcurl4-gnutls-dev git screen libssl-dev


Raspbian Stretch (Raspbian GNU/Linux 9)

$ sudo apt-get install build-essential autotools-dev autoconf libcurl3 libcurl4-gnutls-dev git screen libssl-dev libjansson-dev


Clone and build cpuminer-multi

CentOS 7, Ubuntu 17 and Raspbian Stretch

$ git clone https://github.com/tpruvot/cpuminer-multi.git
$ cd cpuminer-multi
$ ./autogen.sh
$ ./configure CFLAGS="-march=native" --with-crypto --with-curl
$ ./build.sh
$ cd

Join a pool

Sign up with slushpool and get worker details for your computer. You can have different workers for different computers if you so wish. Basically you need a "miner login" (not the same as your slushpool account login) for your worker. This is of the form "yourusername.Worker1" and can be obtained by adding a worker.

Launch cpuminer in a dedicated screen

Use a shell script in your home directory to launch cpuminer with your slushpool worker. Nice it down if your server is doing other more important stuff; cpuminer will happily take up all of your available processing power.

The "password" does not matter here; it is not used.

Change it for your worker unless you want to mine for me.

cpuminer_in_screen.sh

#!/bin/bash
#
# Run niced down cpuminer in screen
#
screen -S cpuminer -m -d nice ~/cpuminer-multi/cpuminer -a sha256d -o stratum+tcp://us-east.stratum.slushpool.com:3333 -O tuklu_san.MyPublicMiner:password
screen -ls

Make the script executable:

$ chmod +x cpuminer_in_screen.sh

and launch it:

$ ./cpuminer_in_screen.sh

Attach to the screen "cpuminer":

$ screen -r cpuminer

You should see something like this:

** cpuminer-multi 1.3.3 by tpruvot@github **
BTC donation address: 1FhDPLPpw18X4srecguG3MxJYe4a1JsZnd (tpruvot)

[2017-12-14 13:18:46] Starting Stratum on stratum+tcp://us-east.stratum.slushpool.com:3333
[2017-12-14 13:18:46] 2 miner threads started, using 'sha256d' algorithm.
[2017-12-14 13:18:46] Stratum difficulty set to 2048
[2017-12-14 13:18:46] sha256d block 499253, diff 1590896927258.079
[2017-12-14 13:18:48] CPU #0: 1207 kH/s
[2017-12-14 13:18:48] CPU #1: 1197 kH/s
...
...


Detach from the screen using Ctrl-a, d. Watch your slushpool account for progress.

Payouts

You will need to set a bitcoin wallet number in your slushpool account to receive payouts if you ever get to that point. I already had a coinbase account with a bitcoin wallet number that I used for this purpose. 

It is just an experiment

I do not expect anything to really happen in terms of payouts. My slushpool dashboard says I will complete mining one-tenth of a bitcoin in another 79 years and some months.

Once again, if you are serious, invest in a modern ASIC based miner. Be aware, though, of the fact that the vendors of these ASIC bitcoin miner hardware are making more money selling them than folks actually making money off bitcoin mining. Also, as you will see if you research a bit, the amount of money you will pay your electric utility company will be more than you make mining bitcoins.

Have fun!


Thursday, December 7, 2017

DOS TCP/IP Networking with Internet Services and Web Browsing: PC DOS 2000, Packet Driver, mTCP, Arachne and Dillo

Supratim Sanyal's Blog: DOS Web Browsers: Arachne and Dillo Screenshot
DOS Web Browsers: Arachne (left) and Dillo
In all the time I have been playing with computers going back to when Winston Smith took on Oceania, I have never had an opportunity to try out networking and get on the internet from just DOS on a PC. So I fired up Oracle VirtualBox and went to consult with The Great Search Engine.

It turns out a lot of folks have not only done this, but took pains to document what they did; with a bit of trial and error, I now have a functional PC DOS VirtualBox appliance equipped with CD ROM and SoundBlaster 16 drivers, a Packet Driver for AMD PCnet-Fast III network adapter, the mTCP Suite of TCP/IP stack with client and server networking applications, and two DOS-based graphical web browsers - Dillo and Arachne.

The DOS VirtualBox appliance specs I used: 64 MB RAM, PIIX 3 chipset, PS/2 mouse, no I/O APIC, no EFI, 1 CPU, no PAE/NX, 32 MB video RAM, a Floppy controller, an IDE controller with a 512 MB fixed-sized (not dynamic) hard drive and a CD-ROM drive, SoundBlaster 16 audio card, bridged PCnet-FAST III network adapter, two serial ports and a USB 1.1 OHCI controller.

I needed a way to make downloaded stuff available to the vbox appliance via floppy disk and CD-ROM images. I used Magic ISO Maker (Setup_MagicISO.exe) to create floppy and CD images to attach to the appliance and transfer downloaded files. The unregistered version of Magic ISO Maker cannot create images over 300 MB, but this was not a problem for my use cases of creating 3.5" 1.44 MB Floppy disk images and CD ROM ISOs well under the 300 MB limit. This way I could also have an archive of the floppy disks and CD ROMs used to build this VM. I avoided VirtualBox's shared folder feature.

Supratim Sanyal's Blog: Magic ISO Maker for 1.44 MB Floppy Disk and CD ROM ISO image creation
Magic ISO Maker for 1.44 MB Floppy Disk and CD ROM ISO image creation

IBM PC DOS 2000

Supratim Sanyal's Blog: IBM PC DOS 2000 (PC DOS 7 Revision 1) Installation Setup Screen
IBM PC DOS 2000 (PC DOS 7.0 Revision 1) Setup


I remembered switching away from Microsoft MS DOS 6.22 to IBM PC DOS 7 based on rumors of the latter being better, faster, more stable with better memory management etc. and generally a good thing to do as it was maintained by the Big Blue. While looking for it, I found out there was actually a later Revision 1 to PC DOS 7 that added Y2K compatibility, marketed as "PC DOS 2000".  I grabbed the six PC DOS 2000 3.5" 1.44 MB floppy disk images and installed everything, including IBM Antivirus and Central Point Backup.

Using PC DOS 7's "E" editor, I edited CONFIG.SYS to increase the amount of memory available for DOS environment variables, enable HIMEM.SYS and EMM386.EXE to make as much of conventional memory free as possible by moving drivers and boot-time programs to upper and extended XMS memory.

CONFIG.SYS:

  SHELL=C:\DOS\COMMAND.COM /E:1024 /P
  DEVICE=C:\DOS\HIMEM.SYS
  DOS=HIGH,UMB
  DEVICEHIGH=C:\DOS\EMM386.EXE NOEMS

CD ROM SUPPORT


Following the typical process of adding CD ROM support to PC DOS, I picked up IBMIDECD.SYS and MSCDEX.EXE, and transferred them over to C:\CDROM\ directory on the vbox VM via a floppy disk created using Magic ISO Maker. I then added the following usual CD ROM related lines to CONFIG.SYS and AUTOEXEC,BAT:

CONFIG.SYS:
    DEVICEHIGH=C:\CDROM\IBMIDECD.SYS /D:IBMCD001

AUTOEXEC.BAT:
    LH C:\CDROM\MSCDEX /D:IBMCD001 /M:10

After reboot, the CD ROM drive appeared as drive D:.

SOUNDBLASTER SB 16 SUPPORT

Supratim Sanyal's Blog: Creative Labs SoundBlaster SB 16 DOS Driver Installation
Creative Labs SoundBlaster SB 16 DOS Driver Installation


Creative Labs still provide a download link to the "sbbasic.exe" self-extracting driver installer for SoundBlaster 16 audio cards for DOS. I put it on a floppy image using Magic ISO Maker, connected that floppy image to the DOS VM to copy sbbasic.exe to a temporary directory and executed it from the DOS prompt. This extracted a INSTALL.EXE along with a bunch of *.PVL and sundry files. I then executed the INSTALL.EXE program to install the SB16 driver and utilities on DOS. The installer also took care of updating CONFIG.SYS and AUTOEXEC.BAT. I later updated CONFIG.SYS to change "DEVICE=" to "DEVICEHIGH=" in the line loading the SB 16 driver.

CONFIG.SYS:
    DEVICEHIGH=C:\SB16\DRV\CSP.SYS /UNIT=0 /BLASTER=A:220

AUTOEXEC.BAT:
    SET SOUND=C:\SB16
    SET BLASTER=A220 I5 D1 H5 P330 T6
    SET MIDI=SYNTH:1 MAP:E
    C:\SB16\DIAGNOSE /S
    C:\SB16\MIXERSET /P /Q


AMD AM79C973 PCnet-FAST III Network Adapter Packet Driver for DOS


Supratim Sanyal's Blog: AMD AM79C973 PCnet-FAST III Network Adapter Packet Driver PCNTPK for DOS initialization at boot
AMD AM79C973 PCnet-FAST III Network Adapter Packet Driver for DOS initialization at boot


AMD's "PCnet Software Version 3.2 October 1996" NIC driver floppy disk includes the DOS packet driver for the PCnet-Fast III (AM79C973) network adapter.

I created a C:\PCNTDRV directory and copied everything on the diskette into it (using XCOPY with /E switch to preserve the directory structure). I then added the following to AUTOEXEC.BAT to load the DOS packet driver at boot time:

LH C:\PCNTDRV\PKTDRVR\PCNTPK INT=0X60

On rebooting, the packet driver located the PCnet-Fast III NIC correctly, and reported the MAC address which matched up with that configured in the VirtualBox settings for the VM. There is also a nifty set of tools in the C:\PCNTDRV\PKTDRVR directory that can be used to check and monitor network traffic, for example C:\PCNTDRV\PKTDRVR\PKTSTAT.


mTCP Suite

Supratim Sanyal's Blog: mTCP suite TCP/IP stack and applications for DOS: ping and pkttool scan
mTCP suite TCP/IP stack and applications for DOS: ping and pkttool scan


Now that the packet driver for the network adapter was working, it was time to try some basic TCP/IP utilities. Michael B. Brutman's amazing mTCP Suite comes with all standard TCP/IP client applications as well as a web server and FTP server. The current version of the entire suite is around 964 KB in size. I created a floppy image using Magic ISO Maker containing everything extracted from the downloaded mTCP zip file and copied over the mTCP Suite into the DOS appliance under the directory C:\MTCP.

Following the documentation, I gave it a static IP address (you can use DHCP if you wish; read the PDF manual) by configuring this into a C:\MTCP\MYCONFIG.TXT file:

PACKETINT 0X60
IPADDR 10.100.0.20
NETMASK 255.255.255.0
GATEWAY 10.100.0.1
NAMESERVER 10.100.0.1

Then I set the MTCPCFG environment variable in AUTOEXEC.BAT to point to the configuration file:

SET MTCPCFG=C:\MTCP\MYCONFIG.TXT

and rebooted. That was all that was needed to get mTCP's TCP/IP stack and tools to work.

mTCP includes an SNTP client, great news for me being a NTP time sync nut running multiple public time-servers contributing to the NTP Pool Project. I added the following at the bottom of AUTOEXEC.BAT to sync the system clock with pool.ntp.org at boot:

SET TZ=UTC
C:\MTCP\SNTP -SET POOL.NTP.ORG


ARACHNE WEB BROWSER FOR DOS

Supratim Sanyal's Blog: Arachne: MS DOS / PC DOS Graphical Web Browser
Arachne: DOS Web Browser


I downloaded the Arachne 1.97; GPL zipped self-extracting EXE and extracted it to a temporary folder on my Windows 10 host laptop. This resulted in a 1,272 KB A197GPL.EXE which Windows 10 refused to execute. Using Magic ISO Maker, I created a 1.44 MB floppy disk image containing A197GPL.EXE and transferred it to the DOS vbox into a temporary directory and executed it from DOS. Surprise! A197GPL.EXE is not just a self-extracting archive, it is an installer that installed Arachne to C:\ARACHNE (the default) while showing a nifty white-on-blue progress bar.

The installer left me inside the C:\ARACHNE directory with instructions to execute ARACHNE.BAT to configure it. Doing so presented a graphical setup procedure with a series of screens to define the screen resolution and internet connection. I selected the "Packet Wizard" since I already had a Packet Driver up and running for the network adapter. It auto-detected the Packet Driver successfully and then presented the usual DHCP vs. Static Address options for TCP/IP configuration. I configured a static IP address (similar to the mTCP setup).

The setup procedure then asked for email configuration (Arachne is also a email client) which I skipped over retaining the non-working defaults for now. It then presented a screen full of sundry options (long filename support, timezone, character set etc.) before writing out the configuration file to C:\ARACHNE\ARACHNE.CFG and presenting a Arachne Options screen. I indicated that I was happy with the displayed options, and was finally presented a web-browser screen, with a URL address bar.

Sadly, Arachne does not support SSL-secured HTTPS, and seems to go into a loop forwarding HTTPS port to HTTP back to HTTPS when I tried to browse to, for example, www.bankofamerica.com. It is not too tight a loop - I could click the "X" on the toolbox and interrupt it. Perhaps setting the configuration item "HTTPS2HTTP Yes" to "No" under the "[auto-added]" section will address this somehow, something to try later.

Supratim Sanyal's Blog: The Arachne DOS Browser Desktop
Arachne DOS Browser Desktop

I made some minor tweaks to C:\ARACHNE\ARACHNE.CFG (full ARACHNE.CFG file here) for the home and search pages in the [internet] section:

HomePage http://www.google.com/
SearchPage http://www.google.com/
SearchEngine http://www.google.com/search?q=

Arachne tries to be many things. It includes a phone dialer. It is a email client. Clicking on the little icon of the desk labelled "Desktop" launches a file manager.

DILLO WEB BROWSER FOR DOS

Supratim Sanyal's Blog: Dillo MS DOS / PC DOS Web Browser
Dillo: DOS Web Browser

I downloaded the latest 3.02b version of Dillo DOS Web Browser zip file from archive.org. The total file size of the extracted files was over 5 MB. I used Magic ISO Maker to create a ISO CD image containing the extracted files and connected that ISO image to the CD ROM drive of vbox DOS. I then copied the files into C:\DILLODOS directory. Then I configured the network details (IP Address, Netmask, DNS name server, gateway etc.) in C:\DILLODOS\BIN\WATTCP.CFG and launched Dillo by executing DILLO.BAT from the C:\DILLODOS directory.

That was all I needed to do to fire Dillo up. The browser (or perhaps the WATTCP stack it uses) figured out the Packet Driver and launched straightaway without any further questions about how to connect.

Dillo is faster than Arachne. It also handles SSL-equipped secure web sites using HTTPS protocol.

In many ways, Dillo is far closer to a modern browser than Arachne. Given a choice, I would probably use Dillo as my primary web browser on a PC running MS DOS or PC DOS.

CONFIG.SYS and AUTOEXEC.BAT

Here are the two PC DOS startup files in full for reference.

CONFIG.SYS
SHELL=C:\DOS\COMMAND.COM /E:1024 /P
FILES=40
BUFFERS=10
DEVICE=C:\DOS\HIMEM.SYS
DOS=HIGH,UMB
DEVICEHIGH=C:\DOS\EMM386.EXE NOEMS
DEVICEHIGH=C:\SB16\DRV\CSP.SYS /UNIT=0 /BLASTER=A:220
DEVICEHIGH=C:\DOS\SETVER.EXE
DEVICEHIGH=C:\DOS\POWER.EXE ADV:MAX
DEVICEHIGH=C:\CDROM\IBMIDECD.SYS /D:IBMCD001

AUTOEXEC.BAT
@ECHO OFF
SET SOUND=C:\SB16
SET BLASTER=A220 I5 D1 H5 P330 T6
SET MIDI=SYNTH:1 MAP:E
C:\SB16\DIAGNOSE /S
C:\SB16\MIXERSET /P /Q
SET PATH=C:\DOS;C:\MTCP;C:\BIN;%PATH%
SET TEMP=C:\TEMP
SET TMP=C:\TEMP
LH C:\DOS\MOUSE.COM
LH C:\DOS\DOSKEY.COM
LH C:\CDROM\MSCDEX /D:IBMCD001 /M:10
LH C:\PCNTDRV\PKTDRVR\PCNTPK INT=0X60
SET MTCPCFG=C:\MTCP\MYCONFIG.TXT
SET TZ=UTC
C:\MTCP\SNTP -SET POOL.NTP.ORG
SET IBMAV=C:\DOS
CALL C:\DOS\IBMAVDR.BAT C:\DOS\
ECHO ---
ECHO TO CHANGE IP ADDRESS, USE THE "E" EDITOR TO EDIT:
ECHO     - C:\MTCP\MYCONFIG.TXT
ECHO     - C:\ARACHNE\ARACHNE.CFG
ECHO     - C:\DILLODOS\BIN\WATTCP.CFG
ECHO TO RUN ARACHNE WEB BROWSER:
ECHO     - CD C:\ARACHNE
ECHO     - ARACHNE.BAT
ECHO TO RUN DILLO WEB BROWSER:
ECHO    - CD C:\DILLODOS
ECHO    - DILLO.BAT
ECHO ---

Downloads

I have archived all the Floppy Disk and CD ISO images mentioned in this post as well as a complete virtualbox appliance at my google drive.


Friday, November 17, 2017

Hello Again, Neko the Desktop Mouse-Chasing Cat!


Supratim Sanyal's Blog: Neko Desktop Mouse-Chasing Cat
I too first met Neko as a young teenager playing with Windows 3.1. Neko would always come running to the mouse pointer and park himself above it. He would scratch and clean himself a little bit, and then, if the mouse pointer was not moving, yawn and take a nap.

Over the next few years, I kept bumping into Neko across subsequent Windows flavors - Windows 95, Windows 98, Windows ME and Windows XP, and IBM OS/2 Warp. We had eventually parted ways somewhere around the tail-end of the last millennium. Neko had remained with me as a sweet memory.

That is, until I discovered this awesome post by neozeed. The author of the post has done all the hard work in finding Neko, including making Neko source-code available to the public and bringing him back on 64-bit Windows 10.

I downloaded the zip archive containing the source code and compiled it using Visual C++ 6.0 on a Windows XP 32-bit appliance. There were no compilation errors for the Neko executable and just two ignorable compilation warnings for the Neko configuration utility "NekoCFG".


Say hello again Neko! I missed you.

Here is my Neko build directory download.


Monday, November 13, 2017

beef dead beef dead beef dead beef dead (Cookies/index.dat)

So I installed busybox on a legacy Windows XP Pro system, and while playing around with it, took a hexdump of Cookies/index.dat, and got the following line at the end of the hex dump.

beef dead beef dead beef dead beef dead

I do not know why or what it means.

~ $ uname -a

Windows_NT wexpee 5.1 2600 i686 MS/Windows
~ $ hexdump Cookies/index.dat
0000000 6c43 6569 746e 5520 6c72 6143 6863 2065
0000010 4d4d 2046 6556 2072 2e35 0032 8000 0000
0000020 4000 0000 0080 0000 0020 0000 0000 0000
0000030 0000 0080 0000 0000 0000 0000 0000 0000
0000040 0000 0000 0000 0000 0000 0000 0000 0000
*
0000250 ffff ffff 0000 0000 0000 0000 0000 0000
0000260 0000 0000 0000 0000 0000 0000 0000 0000
*
0004000 4148 4853 0020 0000 0000 0000 0000 0000
0004010 0003 0000 0003 0000 0003 0000 0003 0000
*
0004240 0001 0000 5100 0000 0003 0000 0003 0000
0004250 0003 0000 0003 0000 0003 0000 0003 0000
*
0004390 0001 0000 5200 0000 0003 0000 0003 0000
00043a0 0003 0000 0003 0000 0003 0000 0003 0000
*
0004630 0001 0000 5000 0000 0003 0000 0003 0000
0004640 0003 0000 0003 0000 0003 0000 0003 0000
*
0004660 0003 0000 0003 0000 0001 0000 5000 0000
0004670 0003 0000 0003 0000 0003 0000 0003 0000
*
0004ac0 0003 0000 0003 0000 0001 0000 5000 0000
0004ad0 0003 0000 0003 0000 0003 0000 0003 0000
*
0004c80 0003 0000 0003 0000 0001 0000 5100 0000
0004c90 0003 0000 0003 0000 0003 0000 0003 0000
*
0004d30 0001 0000 5000 0000 0003 0000 0003 0000
0004d40 0003 0000 0003 0000 0003 0000 0003 0000
*
0004dd0 0003 0000 0003 0000 0001 0000 5000 0000
0004de0 0003 0000 0003 0000 0003 0000 0003 0000
*
0004e10 beef dead beef dead beef dead beef dead
*
0005000 0000 0000 0000 0000 0000 0000 0000 0000
*
0008000

Saturday, October 28, 2017

The Best Windows NTFS File System Defragmentation Tool for Platter Drives

Supratim Sanyal's Blog - Power Defrag - Top Windows Defragment Tool
I have reached the end of the internet and found the ultimate defragmenter for NTFS file systems on Windows.

Well - sort of. I still use platter drives while I still watch SSD with keen interest, I do not have full faith on SSD drives yet. In the last couple of months, I have seen SSD drives swapped out for good old high-speed platter disk drives (specifically, the fabulous 15K / 15000 RPM 6 GBPS Hard Drives) since the SSDs wouldn't last for more than a couple of weeks on systems needing humongous numbers of read-write cycles. However, for the general user, I do think SSD has come along and we are at a stage where their "functional life outlasts their useful life".

One of the joys of MS-DOS and Windows computer hard disk drives has always been to run defragment tools and watch the little boxes line up, imagining super-fast DISK I/O as soon as the hours-long processes complete. All of us have spent significant portions of our lives defragmenting hard disks - Norton Utilities Speed Disk, PC Tools, the defragmenters included with DOS and Windows from Microsoft, the continuing search for the best ... we have fond memories.

I believe that search has ended now, a quarter century from running a defragmenter the first time.

Curiously, it is not yet another defragmentation tool by itself; it just provides a nice GUI to run two Microsoft tools back to back - the venerable Windows Sysinternals Contig that used to be my #1 defragmenter, followed by the ubiquitous defragmenter included with Windows. The tool actually does not claim to be a defragmentation utility by itself. The name "Power Defragmenter GUI" is very clear in conveying this is a GUI front-end to powerful underlying tools.

I have tested it on two Windows XP Pro systems called WEXPEE and WXPEE2 that speak DECnet and are part of the global HECnet hobbyist DECnet network.

As a preparatory step, I highly recommend cleaning out junk from your disk drive before defragmenting it. Useless accumulated files on your drive should be removed and will also make for quicker defragmentation. I use three tools to clean junk from my drives:

  1. The Windows "Disk Cleanup" tool (part of Windows)
  2. System Ninja
  3. CCleaner

To install Power Defragmenter GUI,

Supratim Sanyal's Blog: Power Defragmenter GUI - .exe Executable
Power Defragmenter GUI - .exe Executable

  • Download Power Defragmenter GUI
  • The download is a zip file called Power-Defragmenter.zip that contains just one executable PowerDefragmenter.exe; extract the zip file into a new dedicated folder containing the executable PowerDefragmenter.exe. For example, extract the zip file into the folder c:\temp\power-defrag\ so that you extract the 481 KB executable into c:\temp\power-defrag\PowerDefragmenter.exe.

Supratim Sanyal's Blog: Microsoft Sysinternals Contig - exe Executable
Microsoft Sysinternals Contig - exe Executable
  • Download Widnows Sysinternals Contig
  • Again, the Contig download is a zip file called Contig.zip that contains 32 and 64-bit versions of contig.exe and a EULA. The 32-bit contig.exe executable is just 248 KB! Extract contig.zip into another new dedicated folder. For example, extract Contig.zip into c:\temp\contig\

Supratim Sanyal's Blog: Copy files in Contig folder to Power Defragmenter GUI folder
Copy files in Contig folder to Power Defragmenter GUI folder

  • Now copy over the Contig files from the directory you unzipped Contig into to the directory you unzipped Power Defragmenter GUI into. In the examples above, this means copy the files from c:\temp\contig\ to c:\temp\power-defrag\.
Supratim Sanyal's Blog: Run PowerDefragmenter.exe Executable to launch Power Defragmenter GUI
Run PowerDefragmenter.exe

That is it as far installation of Power Defragmenter GUI  is concerned. You can now launch PowerDefragmenter.exe by double-clicking it from the folder you extracted Power Defragmenter GUI into that now also has the Contig.exe executable.

Power Defragmenter GUI will start up showing a progress-bar indicating it is launching Power Defragmenter GUI installer and then present the main screen. I guess the "installer" notice is shown because Power Defragmenter declares itself as an installer to grab administrative rights; it does not really "install" anything and runs totally from the folder.

Supratim Sanyal's Blog: Power Defragmenter GUI initial screen
Power Defragmenter GUI initial screen

If you see carefully, you will notice the little note at the bottom above the buttons saying that Power Defragmenter GUI has located the version of Contig.Exe you copied over to it's folder.

Clicking "Next" will bring you to the following screen:

Supratim Sanyal's Blog: Power Defragmenter GUI - Defragmentation Options
Power Defragmenter GUI - Defragmentation Options


I always choose the last option, "TriplePass(TM) Disk Defragmentation" to defragment the heck out of my drives. This is also where the true power of the tool comes through. So, go ahead, choose "TriplePass(TM) Disk Defragmentation" and click Next.

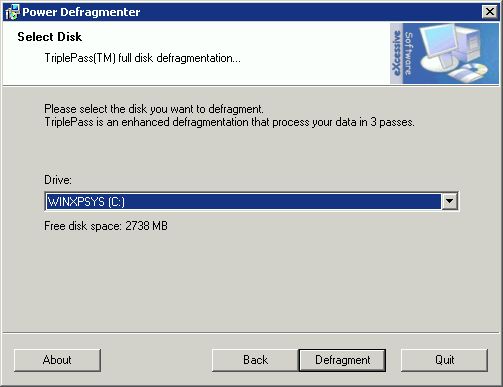
Supratim Sanyal's Blog: Power Defragmenter GUI: Choose Drive to Defragment
Power Defragmenter GUI: Choose Drive to Defragment

Choose the drive to defragment (the system drive should already be selected; you can use the drop-down list to defragment other drives if you have them) and click on Defragment to start the defragmentation process.

Power Defragmenter GUI will first launch Contig for deep-defragmentation of files. Contig may present a EULA to accepts the first time it is launched, simply accept the EULA once and your computer remembers it. You can use Ctrl-S and Ctrl-Q to pause and resule the fast-scrolling output if you want to look at what is going on.

Supratim Sanyal's Blog: Power Defragmenter GUI invokes Windows Sysinternals Contig for three passes
Power Defragmenter GUI invokes Windows Sysinternals Contig for three passes
Update: In prior versions, Power Defragmenter GUI then invoked the Windows Defragmenter tool included with Windows to wrap of the ferocious attack on file system fragmentation. This no longer seems to be the case, apparently from the time Power Defragmenter GUI was updated to support Windows Vista and later. Here is a screenshot from the older versions showing Power Defragmenter GUI invoking Windows Defragmenter in command mode; once again, this will probably not happen any more.

Supratim Sanyal's Blog: Power Defragmenter GUI invokes Windows Defragment Tool
Power Defragmenter GUI invokes Windows Defragment Tool

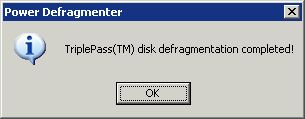
You will be informed when Power Defragmenter GUI is done:

Supratim Sanyal's Blog: Power Defragmenter GUI - TriplePass(TM) completed
Power Defragmenter GUI - TriplePass(TM) completed

If you are running Windows in a virtual machine, now is a good time to zero out the free space on the virtual drive using sysinternals sdelete, shut down the Windows VM, compact the virtual disk using the hypervisor-provided tool and take a backup of the VM. This results in the smallest backup archive size for the VM.


Sunday, September 24, 2017

The DECnet-Linux Experience: It Works!

Supratim Sanyal's Blog: DECnet Linux Communication Between two Linux nodes
Ubuntu 14.04 Linux Twins FEDACH (1.553) and FOMFOR (1.554) Talk over DECnet
I was aware of an implementation of the DECnet Phase IV network protocol on the Linux kernel for quite a while now, and recently decided to take the plunge and give it a shot, with additional motivation from this inspiring Retrocomp post.

It was not going well initially because of a bad call I made to try to install ancient releases of Linux distributions from Debian and Fedora from around the time DECnet-Linux was first announced. As a result, I spent many sleepless nights trying to find the packages and dependencies for Linux distros featuring DECnet from the first few years of the new millennium.

Eventually I did what I should have started off with: check if modern Linux distributions still include DECnet-Linux. A search of the kernel of the bleeding-edge Ubuntu 17 "Zesty Zapus" looked promising; DECnet-Linux was indeed compiled right into Ubuntu 17's mainline 4.10 kernel build and the required libdnet, dnet-common and dnprogs packages were available for Ubuntu 17.

Unfortunately, Ubuntu 17's support for DECnet-Linux turned out to be dysfunctional. I created two virtual machines with Ubuntu 17 and installed the DECnet tools, but could not get any farther than the dneigh command showing the other node. FAL, Phone, sethost, etc. would simply not work and would sometimes lock up the virtual machines.

Frustrated, I posted the question to the fabulous folks at the comp.os.vms newgroup. Within a day, I had a path forward; it was clear from John E. Malmberg and "hb" that I needed to try Ubuntu 14.04 or earlier; DECnet-Linux was definitely broken after Ubuntu 14.04.

Re-energized, I proceeded to install the 32-bit release of Ubuntu 14.04.5 LTS (Trusty Tahr) on two virtual machines using the lightweight lubuntu flavor from the Desktop ISO CD image. Then apt-get install dnprogs brought in everything I needed to get DECnet-linux mostly up (the official Ubuntu 14 repositories still work at the time of writing, no need to look for mysterious archives of no-longer supported releases yet.)

However, I still had to make a couple of little tweaks to have DECnet-Linux work all the way. Here are the things I did over and after the default install of DECnet-Linux from Ubuntu 14.04 repositories.

1. The official dnprogs and family of packages from Ubuntu 14.04 repos installed versions of /usr/sbin/dnetnml and /usr/sbin/ctermd that did not work well. The dnetnml program was not responding correctly by showing executor, line, or circuit etc. characteristics when requested by other nodes. Also, attempts to SET HOST from other nodes resulted in the official ctermd program to look for a non-existent local "pty" device and fail.

To get around these problems, I downloaded the source code tarball dnprogs_2.62.tar.gz which is available in practically all Ubuntu 14 mirrors including here. I then built the entire DECnet program suite locally, and then replaced the /usr/sbin/dnetnml and /usr/sbin/ctermd binaries with the ones built locally from source.

2. The official dnprogs installation was not filling in the correct DECnet node-name and address in the files /proc/sys/net/decnet/node_name and /proc/sys/net/decnet/node_address; these file always had "???" and 0.0 despite the correct DECnet executor address being defined in /etc/decnet.conf configuration file. This was resulting in some strange behavior indicating DECnet/Linux was not using the adjacent router node to reach nodes outside the local network, but trying to access them directly and failing. I added simple commands in the /etc/rc.local file (and made it executable and exit with 0) to force the correct DECnet node-name and DECnet address:

# -- rc.local DECnet kludge - /proc/sys/net/decnet/node_name has ???; force it
echo FOMFOR > /proc/sys/net/decnet/node_name
# -- rc.local DECnet kludge - /proc/sys/net/decnet/node_address has 0.0; force it
echo 1.554 > /proc/sys/net/decnet/node_address
# --

3. In an attempt to control "DECnet event 4.3, oversized packet loss" errors when accessing the FAL server on DECnet-linux from remote nodes, I forced the MTU of the DECnet NIC (eth1 in my case) to 576 by adding "mtu 576" to /etc/network/interfaces. I am not sure this actually helps in controlling the error. Here are the corresponding sections of /etc/network/interfaces:

FEDACH

# DECnet 1.553
auto eth1
iface eth1 inet manual
    # MAC address corresponding to DECnet Address
    hwaddress ether aa:00:04:00:29:06
    # Brave attempt to avoid sporadic errors on router node like the following:
    # "DECnet event 4.3, oversized packet loss"
    mtu 576

FOMFOR

# DECnet 1.554
auto eth1
iface eth1 inet manual
    # MAC address corresponding to DECnet Address
    hwaddress ether aa:00:04:00:2a:06
    # Brave attempt to avoid sporadic errors on router node like the following:
    # "DECnet event 4.3, oversized packet loss"
    mtu 576

My two Ubuntu 14.04 virtual machines are named FEDACH and FOMFOR after the twin sons of Macha, daughter of Aodh Ruad. FEDACH has a DECnet address of 1.553 and FOMFOR has 1.554. They are now both connected to HECnet - the global hobbyist DECnet. They are configured to use DECnet on the eth1 network adapter (eth0 is dedicated to IP); the eth1 adapter has the correct MAC address corresponding to the DECnet address as required by DECnet:

1.553 => aa:00:04:00:29:06
1.554 => aa:00:04:00:2a:06

You can quickly look up the MAC address as well as the SCSSYSTEMID SYSGEN parameter for OpenVMS systems corresponding to a DECnet address using my free online DECnet - MAC address - SCSSYSTEMID Calculator.

Also, as DECnet uses all available NICs by default, I modified /etc/default/decnet to have DECnet on eth1 only, and increase verbosity of logging by the dnetd daemon. In addition, I modified the /etc/decnet.conf and /etc/decnet.proxy files as recommended by DECnet-linux documentation and man pages. Here is the output of "ip address show" for eth1 on the two nodes:

FEDACH

3: eth1: <BROADCAST,MULTICAST,UP,LOWER_UP> mtu 576 qdisc pfifo_fast state UP group default qlen 1000
    link/ether aa:00:04:00:29:06 brd ff:ff:ff:ff:ff:ff
    dnet 1.553 peer 1.553/16 scope global eth1

FOMFOR

3: eth1: <BROADCAST,MULTICAST,UP,LOWER_UP> mtu 576 qdisc pfifo_fast state UP group default qlen 1000
    link/ether aa:00:04:00:2a:06 brd ff:ff:ff:ff:ff:ff
    dnet 1.554 peer 1.554/16 scope global eth1


I created a "decnet" user account for FAL etc. to use by default as configured in /etc/decnet.proxy and the DECnet objects in /etc/dnetd.conf; interactive logins are disabled for this "decnet" account.

Lastly, I wanted the mail system to use the "decnet" account as well instead of the default (and non-existent) "vmsmail" account and created the file /etc/vmsmail.conf with a single line:

username=decnet

Usual DECnet network access commands all work from an external OpenVMS VAX 7.3 Node:

$ MC NCP TELL FEDACH SHOW EXECUTOR CHAR


Node Volatile Characteristics as of 25-SEP-2017 00:32:23

Executor node = 1.553 (FEDACH)

Circuit                  = eth1
State                    = on
Identification           = DECnet for Linux V3.13.0-129-generic on i686


$ DIR FEDACH::

Directory FEDACH::HOME:[DECNET]

DECNET-BUILD.TGZ;1  DECNET.TXT;1        INFO.TXT;1

Total of 3 files.
$ SET HOST FEDACH::
CTERM Version 1.0.6
DECnet for Linux

fedach login:


Mail also works from VMS to Linux over DECnet.

$ MAIL/SUBJECT="TEST MAIL FROM OPENVMS VAX TO UBUNTU DECNET-LINUX" X.COM FEDACH::ROOT

Produces these syslog entries on FEDACH showing mail delivery success:

Sep 29 10:20:46 fedach dnetd[1211]: Connection from: qcocal::sanyal
Sep 29 10:20:46 fedach dnetd[1211]: using user decnet from dnetd.conf
Sep 29 10:20:46 fedach dnetd[2108]: Starting daemon 'vmsmaild'
Sep 29 10:20:46 fedach vmsmaild[2108]: got local user: ROOT
Sep 29 10:20:46 fedach vmsmaild[2108]: Forwarding mail from qcocal::SANYAL       to root
Sep 29 10:20:46 fedach dnetd[1211]: Reaped child process 2108
Sep 29 10:20:46 fedach postfix/pickup[1351]: 8927E6CAB7: uid=1001 from=<decnet>
Sep 29 10:20:46 fedach postfix/cleanup[2112]: 8927E6CAB7: message-id=<20170929142046.8927E6CAB7@fedach.sanyalnet.lan>
Sep 29 10:20:46 fedach postfix/qmgr[1352]: 8927E6CAB7: from=<decnet@fedach.sanyalnet.lan>, size=1029, nrcpt=1 (queue active)
Sep 29 10:20:46 fedach postfix/local[2114]: 8927E6CAB7: to=<root@fedach.sanyalnet.lan>, orig_to=<root>, relay=local, delay=0.16, delays=0.06/0.1/0/0, dsn=2.0.0, status=sent (delivered to mailbox)
Sep 29 10:20:46 fedach postfix/qmgr[1352]: 8927E6CAB7: removed


DOWNLOADS

The DECnet-Linux configuration files for my two nodes along with the Ubuntu 14 CD ISO and dnprogs_2.62.tar.gz source files and binaries built on my nodes are available from my google drive here.


CONFIGURATION FILES

/etc/dnetd.conf (Identical for FEDACH and FOMFOR)


/etc/decnet.proxy (Identical for FEDACH and FOMFOR)


/etc/default/decnet (Identical for FEDACH and FOMFOR)


/etc/decnet.conf (FEDACH)


/etc/decnet.conf (FOMFOR)


-x-

Tuesday, September 12, 2017

DECnet Phase IV: copy node database from remote host and share it with other nodes over network with Digital DEC servers

Supratim Sanyal's Blog: DECnet-20 on TOPS-20 (TWENEX)
DECnet-20 on TOPS-20 (TWENEX) from "TOPS-20 DECnet-20 Programmer's Guide and Operations Manual" at Bitsavers


DECnet Phase IV on OpenVMS VAX 7.3

To copy the nodes database from a remote host and make it available to other nodes to copy from my node, I use the command file at the bottom. Here <REMOTE-NODE> is the DECnet node name / address of the host I copy my node database from.

After copying over the remote node database from another server (a PDP-11/24 running RSX-11M Plus that serves HECnet the world-wide hobbyist DECnet in this case), I basically copy SYS$SYSTEM:NETNODE_LOCAL.DAT and SYS$SYSTEM:NETNODE_REMOTE.DAT to SYS$COMMON:[SYSEXE] and grant them world-read permission.

Before doing this, other nodes that tried to copy the node database from my node (1.559) used to get this error, which does not happen any more:
$ MC NCP TELL 1.559 LIST KNOWN NODES
Known Node Permanent Summary as of 12-SEP-2017 18:29:00
%NCP-W-FILOPE, File open error , Permanent database
%NML-E-OPENIN, error opening SYS$COMMON:[SYSEXE]NETNODE_LOCAL.DAT; as input
-RMS-E-FNF, file not found

I also played around with enabling the NML proxy before running the commands in the DCL command file at bottom. I am not sure if I had enabled the NML proxy during installation of DECnet Phase IV and if these were required, but just doing these did not solve the problem. They may be required part of the solution, though.

$ MC NCP SET EXECUTOR INCOMING PROXY ENABLE
$ MC NCP DEFINE EXECUTOR INCOMING PROXY ENABLE
$ MC NCP SET OBJECT NML PROXY INCOMING
$ MC NCP DEFINE OBJECT NML PROXY INCOMING

Here is the DCL script:

$ SET PROC/PRIV=ALL
$ MC NCP copy known nodes from <REMOTE-NODE> using volatile to BOTH
$ MC NCP LIST KNOWN NODES
$ COPY/LOG/NOCONF SYS$SYSTEM:NETNODE_LOCAL.DAT SYS$COMMON:[SYSEXE]NETNODE_LOCAL.DAT
$ SET FILE/LOG/PROT=(W:R) SYS$COMMON:[SYSEXE]NETNODE_LOCAL.DAT
$ COPY/LOG/NOCONF SYS$SYSTEM:NETNODE_REMOTE.DAT SYS$COMMON:[SYSEXE]NETNODE_REMOTE.DAT
$ SET FILE/LOG/PROT=(W:R) SYS$COMMON:[SYSEXE]NETNODE_REMOTE.DAT


PDP-11/24 RSX-11M-PLUS 4.6


The HECnet node database is diligently maintained current at http://mim.update.uu.se/hecnod. It is a list of nodes, one per line, with a search box at the top. The line entries are in the form of white-space delimited information fields per node for HECnet nodes. The first two fields are the DECnet node address and the node name in round brackets. Here is an example line entry:

31.3 (PYRTR)    Reachable                   IP-0-9       31.3 (PYRTR)

The following simple Linux command-line fetches the HECnet node database over HTTP and produces a "nodename.cmd" command file that can be uploaded and executed on PDP-11/24 systems running RSX-11M-PLUS operating system (for example, my own node JUICHI). The command file will be a series of NCP command lines, one per node, setting the node addresses to node names.

curl -sNm 60 http://mim.update.uu.se/hecnod | dos2unix | egrep "^[0-9]" | cut -f 1-2 -d " " | sed -re 's/^/NCP SET NODE /' | sed -re 's/[(]/NAME /' | sed -re 's/[)]//' > nodename.cmd

But the resultant nodename.cmd misses the entry of 1.13 (MIM) because MIM is the executor and only mentions itself at the top of the list, not in the actual list of known nodes. So manually edit nodename.cmd and add a line for MIM:

NCP SET NODE 1.13 NAME MIM

To upload nodename.cmd to JUICHI, I FTP it to QCOCAL VAX and then use DECnet COPY to copy it over to JUICHI.

Alternatively, if we are already connected to HECnet, steps like the following get the node database straight from MIM using CFE. We can ignore the warnings for trying to redefine the executor's node name and address.


UNIBUS (UNA network device):

>NCP SET NODE MIM ADDRESS 1.13
NCP -- Set failed, invalid identification format, Node
>NFT FIX.CMD=MIM"GUEST GUEST"::HECNET:FIX.CMD
>RUN [5,54]CFERES
Enter filename: [5,54]CETAB
CFE>@fix.cmd
    DEF >>NOD 31.12 NAME JUICHI
CFE -- Parameter not applicable
CFE>^Z
>


QBUS (QNA network device):

>NCP SET NODE MIM ADDRESS 1.13
>NFT FIX.CMD=MIM"GUEST GUEST"::HECNET:FIX.CMD
>RUN [5,54]CFEFSL
Enter filename: [5,54]CETAB
CFE>@FIX.CMD
    DEF >>NOD 31.34 NAME NANAJU
CFE -- Parameter not applicable
CFE>^Z
>


PDP-10 KS10 TOPS-10 DECnet-10 (TWONKY)


To update the DECnet node database on my PDP-10 KS10 node "TWONKY" I run this command procedure from the [1,2] account:

;NODNAM.CMD
.r opr
*enter ncp
*set node 1.13 name mim
*return
*exit
.r nft
*copy fix.t20=mim::hecnet:FIX.T20/user:guest::guest
;exit
.r opr
*enter ncp
*take fix.t20
*exit
 

PDP-10 KL10 TOPS-20 DECnet-20 (TWENEX)

Current Approach

I have a command file "NODNAM.CMD" with the following contents which I then SUBMIT NODNAM.CMD as a batch job and watch the log using TYPE NODNAM.LOG.

;NODNAM.CMD
@ena
@r opr
*enter ncp
*set node 1.13 name mim
*return
*exit
@nft
*SET DEFAULTS MIM:: /USER:GUEST
*SET DEFAULTS MIM:: /PASSWORD:GUEST
*SET DEFAULTS MIM:: /ACCOUNT:GUEST
*copy mim::hecnet:fix.t20 fix.t20
;Access information for node mim::
;User: guest
;Account: guest
;Password:guest
;mim::DU1:[DECNET]FIX.T20;123 => TOPS20:<OPERATOR>FIX.T20.2 [OK]
*exit
@r opr
*enter ncp
*take fix.t20
*exit
@info batch
@echo game over

Once the bacth job completes, the latest HECnet node names are defined on TWENEX, and I can, for example, successfully do this:

$OPR
OPR>NCP TELL NJEVX2 SHOW EXEC CHAR
OPR>
04:31:53        NCP
                Request # 288 Accepted
OPR>
04:31:53        NCP

Request # 288; Show Executor Node Characteristics Completed

Executor Node = 31.36 (NJEVX2)

  Identification = DECnet for OpenVMS VAX V7.3
  Management Version = 4.0.0
  Incoming Timer = 45
  Outgoing Timer = 60
  Parameter #522 = 0
  Parameter #523 = 0
  NSP Version = 4.1.0
  Maximum Links = 32
  Delay Factor = 80
  Delay Weight = 5
  Inactivity Timer = 60
  Retransmit Factor = 10
  Routing Version = 2.0.0
  Type = Nonrouting IV
  Routing Timer = 600
  Broadcast Routing Timer = 180
  Maximum Address = 1023
  Maximum Circuits = 16
  Maximum Cost = 1022
  Maximum Hops = 30
  Maximum Visits = 63
  Maximum Area = 63
  Maximum Broadcast Nonrouters = 64
  Maximum Broadcast Routers = 32
  Parameter #933 = 1
  Area Maximum Cost = 1022
  Area Maximum Hops = 30
  Maximum Buffers = 100
  Buffer Size = 576
  Non-privileged User ID = DECNET
  Default access = Incoming and outgoing
  Pipeline quota = 4032
  Parameter #2743 = 32
  Parameter #2780 = 0
  Parameter #2785 = 31
OPR>EXIT
$LOGOUT
[Jobs 0(DET), 1, 2(DET), 3, 4, 5, 6, 7, 8 also logged in under OPERATOR]
Killed Job 9, User OPERATOR, TTY5, at 10-Feb-2020 04:38:35

 Used 0:00:00 in 0:04:44

Prior (Obsolete) Approach

To update the DECnet node database on my PDP-10 TWENEX node I first run the following Linux command line to produce a nodnm20.cmd command file. The generated command file is basically a series of lines of the form "SET NODE <xx.yyy> NAME <name>" based on the nodename database retrieved over the web from MIM.


curl -sNm 60 http://mim.update.uu.se/hecnod | dos2unix | egrep "^[0-9]" | cut -f 1-2 -d " " | sed -re 's/^/SET NODE /' | sed -re 's/[(]/NAME /' | sed -re 's/[)]//' > nodnm20.cmd


I then manually edit nodnm20.cmd to add a line for MIM itself:

SET NODE 1.13 NAME MIM

and then upload nodnm20.cmd using OPERATOR account to TWENEX. For uploading, I FTP it to a VAX (e.g. QCOCAL) and the use DECnet COPY from the VAX to TWENEX, like this:

$ COPY/LOG nodnm20.cmd TWENEX"OPERATOR <PASSWORD>"::

Then, my subsequent steps to update the TOPS-20 MONITOR are:

^C
@LOGIN OPERATOR
Password: 
 End of <SYSTEM>LOGIN.CMD.2
 End of LOGIN.CMD.1
@ENA
$COPY NODNM20.CMD  SYS:
 NODNM20.CMD.1 => <SUBSYS>NODNM20.CMD.3 [OK]
$PURGE SYS:
$DIR SYS:NOD*.CMD

   TOPS20:<SUBSYS>
 NODNM20.CMD.3


 Total of 8 pages in 1 file
$RUN SYS:SETNOD
SETNOD>TAKE NODNM20.CMD
SETNOD>SAVE SYSTEM:DECNET-NODES.DAT

SETNOD>INSERT
SETNOD>EXIT


PDP-11/73 RSTS/E 10.1 DECnet/E V4.1


Updating the DECnet node database on my PDP-11/73 running RTST/E 10.1 with DECnet/E 4.1 is similar, but not identical, to TWENEX and RSX-11M-PLUS. The following Linux bash shell script produces a RSTS/E command file defnod.cmd. It includes DEFINE NODE commands and then SET NODE commands to update the permanent as well as volatile node databases.

#!/bin/bash
OUTFILE="defnod.cmd"
echo "SET VER" > ${OUTFILE}
echo "SET NOON" >> ${OUTFILE}
curl -sNm 60 http://mim.update.uu.se/hecnod | dos2unix | egrep "^[0-9]" | cut -f 1-2 -d " " | sed -re 's/^/NCP DEFINE NODE /' | sed -re 's/[(]/NAME /' | sed -re 's/[)]//' >> ${OUTFILE}
sleep 5
curl -sNm 60 http://mim.update.uu.se/hecnod | dos2unix | egrep "^[0-9]" | cut -f 1-2 -d " " | sed -re 's/^/NCP SET NODE /' | sed -re 's/[(]/NAME /' | sed -re 's/[)]//' >> ${OUTFILE}
ls -l ${OUTFILE}


I then manually edit defnod.cmd and add a line for MIM itself:

NCP SET NODE 1.13 NAME MIM

and FTP the final defnod.cmd to a VAX/VMS box and then copy it over DECnet to the [1,2] account on RSTS/E. The /OVERWRITE switch is necessary here since DECnet/E for RSTS/E refuses to overwrite the file if it already exists.

$ copy *nod.cmd RST101"1,2 <password>":: /log /over
%COPY-I-OVERLAY, RST101"1,2 password"::SY:[1,2]DEFNOD.CMD being overwritten
%COPY-S-COPIED, DUA1:[SANYAL]DEFNOD.CMD;2 copied to RST101"1,2 password"::SY:[1,2]DEFNOD.CMD (95 blocks)

Then I log into RSTS/E as 1,2 and execute the command file.

$ @defnod.cmd

A simple test to check if it works:

$ NCP TELl NJEVX2 SHOW EXEC CHAR
Node Volatile Characteristics as of 11-FEB-20 23:23:52

Executor Node = 31.36 (NJEVX2)

Identification             = DECnet for OpenVMS VAX V7.3
Management Version         = 4.0.0
Incoming Timer             = 45
Outgoing Timer             = 60
Parameter #522             = %H'00' 
Parameter #523             = %H'00' 
ECL Version                = 4.1.0
Maximum Links              = 32
Delay Factor               = 80
Delay Weight               = 5
Inactivity Timer           = 60
Retransmit Factor          = 10
Routing Version            = 2.0.0
Type                       = Non-Routing IV
Routing Timer              = 600
Broadcast Routing Timer    = 180
Maximum Address            = 1023
Maximum Circuits           = 16
Maximum Cost               = 1022
Maximum Hops               = 30
Maximum Visits             = 63
Maximum Area               = 63
Max Broadcast Nonrouters   = 64
Max Broadcast Routers      = 32
Parameter #933             = %D'1' 
Area Maximum Cost          = 1022
Area Maximum Hops          = 30
Maximum Buffers            = 100
Buffer Size                = 576
Parameter #2712            = %A'DECNET' 
Parameter #2731            = %H'03' 
Parameter #2740            = %D'4032' 
Parameter #2743            = %D'32' 
Parameter #2780            = %H'00' 
Parameter #2785            = %D'31' 
$ 


Apple Macintosh Classic MacOS 7 & MacOS 9 - Thursby TSSNet / DEC Digital Pathworks for Macintosh

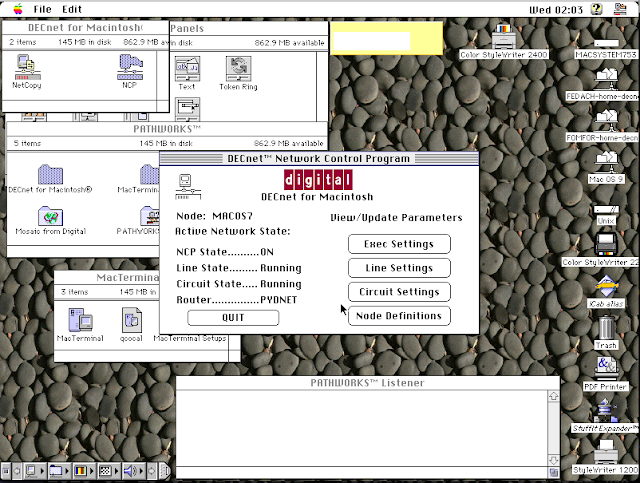
From the TSSNet or DECnet for Macintosh folder, launch the NCP application. This will open up the "DECnet Network Control Program" (NCP) window.

Click on the "Node Definitions" long button on the "DECnet Network Control Program" window.


DECnet for Macintosh: Thursby Software TSSNET for Macintosh: Copy node database - Screen 1


The "DECnet Node Name Management" window will be displayed. Fill in the Area Number and Node Number of the remote DECnet node which you want to copy the node database from. Then click on the "Ask" button.


DECnet for Macintosh: Thursby TSSnet for Macintosh: Copy node database - Screen 2


You will be presented with a windows asking for the Username and Password. Usually there is not Username and Password configured for DECnet Node Database access; leave them empty and click on OK.


DECnet for Macintosh: Thursby Software TSSnet for Macintosh: Copy node database - Screen 3


The next question will be about the name of the node or area number that you are inquiring about. Since we want to copy over the entire node database including all areas and all nodes, enter an asterisk (*) and click on INQUIRE.

DECnet for Macintosh: Thursby TSSNET for Macintosh: Copy node database - Screen 4


A pop-up will now say "Loading Node : " followed by rapidly changing node names as their definitions are copied over from the remote node.


DECnet for Macintosh: Thursby Software TSSNET for Macintosh: Copy node database - Screen 5


Windows NT 4.0 - DEC Pathworks 32 7.4


Supratim Sanyal's Blog: Copy DECnet Phase IV Node Databse from OpenVMS VAX server to Windows NT 4.0 running DEC Pathworks 32 7.4 over DECnet using NCP copy command


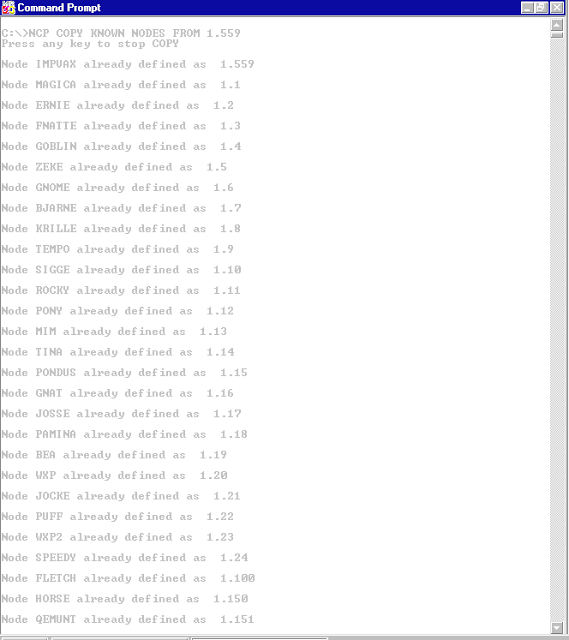
After configuring DEC Pathworks 32 on Windows NT 4.0 and establishing DECnet Phase IV communication with my DECnet nodes, I copied over the DECnet node database from IMPVAX OpenVMS VAX 7.3 (1.559) to Windows NT 4.0 Pathworks-32 using the simple NCP command:

NCP COPY KNOWN NODES FROM 1.559

A subsequent NCP LIST KNOWN NODES command produced a full list of DECnet nodes copied over from IMPVAX.


DECnet/Python


Paul Koning's DECnet/Python expects a list of DECnet nodes and addresses, one on each line, in the format:

node address name

This bash shell script generates a suitable nodenames.conf database for HECnet:

CISCO Switches (DECnet over GRE tunnel on CISCO 7204VXR)


Recommended Products from Amazon